Citrix Studio: Cannot connect to vCenter server due to certificate error

If for any reason, you’ve changed the certificate on your vCenter server, existing Hosting connections in Citrix Studio will break.

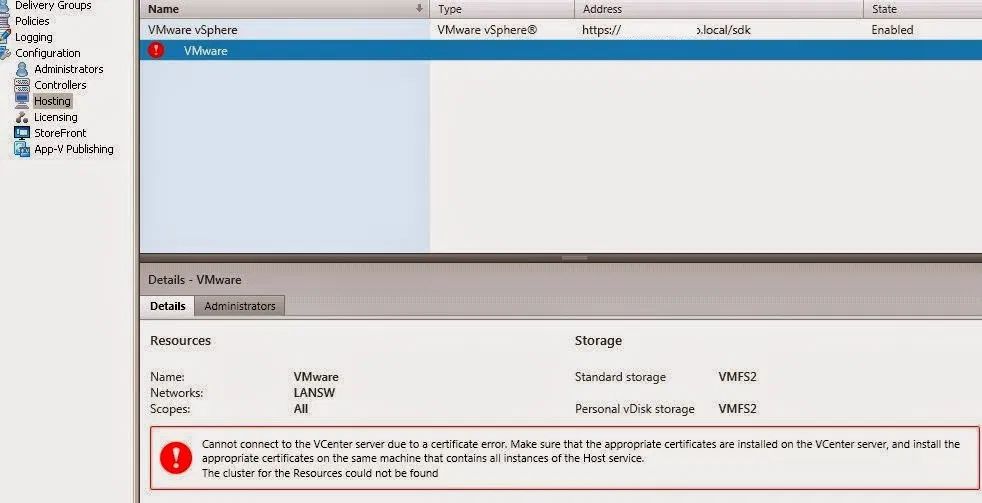
You’ll be presented with an error on existing Hosting Connection or Machine Catalogs stating: “Cannot connect to the vCenter server due to a certificate error. Make sure that the appropriate certificates are installed on the VCenter server, and install the appropriate certificates on every controller in the site.

There are many KB articles, forum posts and blogs explaining how to solve this. One of the things which seems to be ommited (or not clearly stated) in these writings is ‘which’ certificate to import. Many articles point to the download certificate option on the default vCenter website

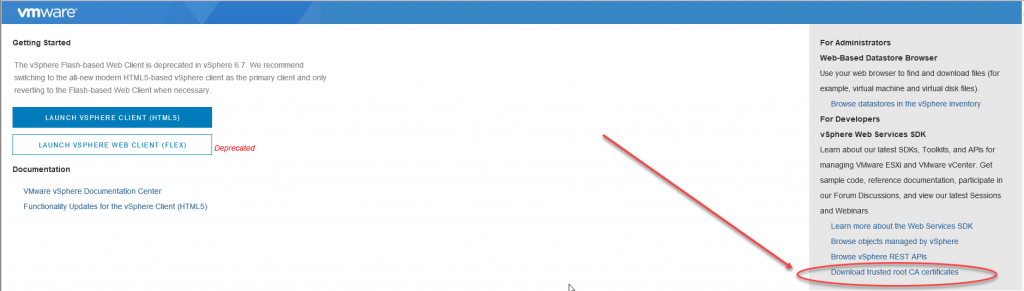
This doesn’t seem to be the correct certificate though. However, I can see where the confusion comes from. As the correct certificate is to be stored in the Trusted Root Certification Authorities, this download link will give you the root certificate of the vCenter server.

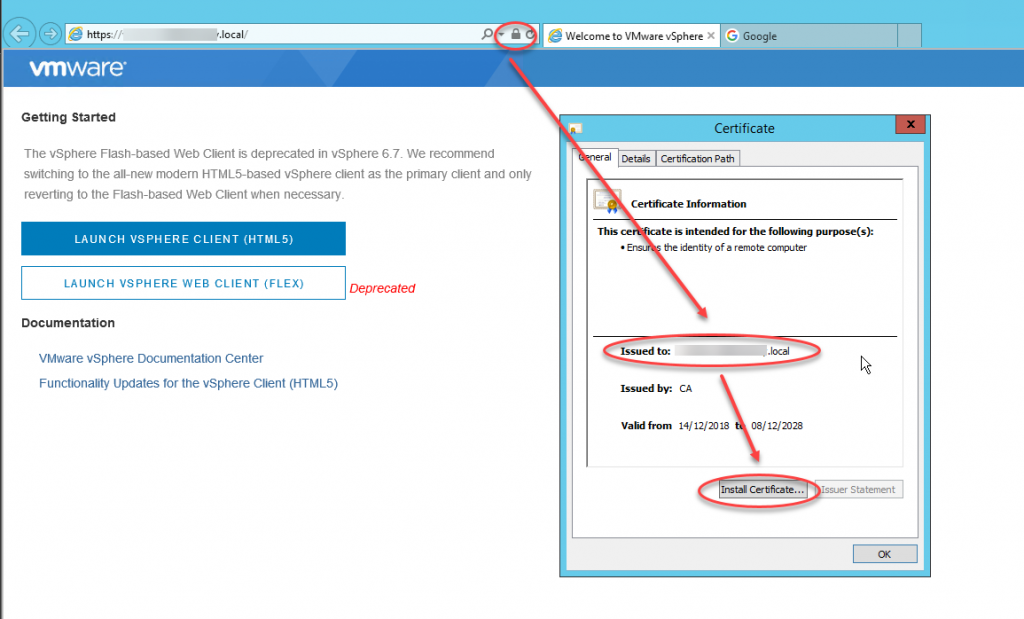
However, the certificate we need, is the last (or first, depending how you read the chain) certificate in the chain, the ‘host certificate‘ with the actual subject name of your vCenter. It’s this certificate which we need to install in the Trusted Root Certification Authorities (and Trusted People!). Although it doesn’t seem to make any sense to place this certificate in these Certificate Stores, it does work (for me that is). I assume you know how to install a certficate (otherwise any search engine is your best friend).

Once you’ve imported the certificates in the correct certificate stores (on every Desktop Delivery Controller!) you need to check whether the correct SSL Thumbprint is available in the XA/XD database (see also method 2 in this Citrix KB article). Open an admin POSH console, load the Citrix Modules (asnp citrix*) and cd to XDHyp:/Connections and run ls. Check the SSLThumbprints entry.

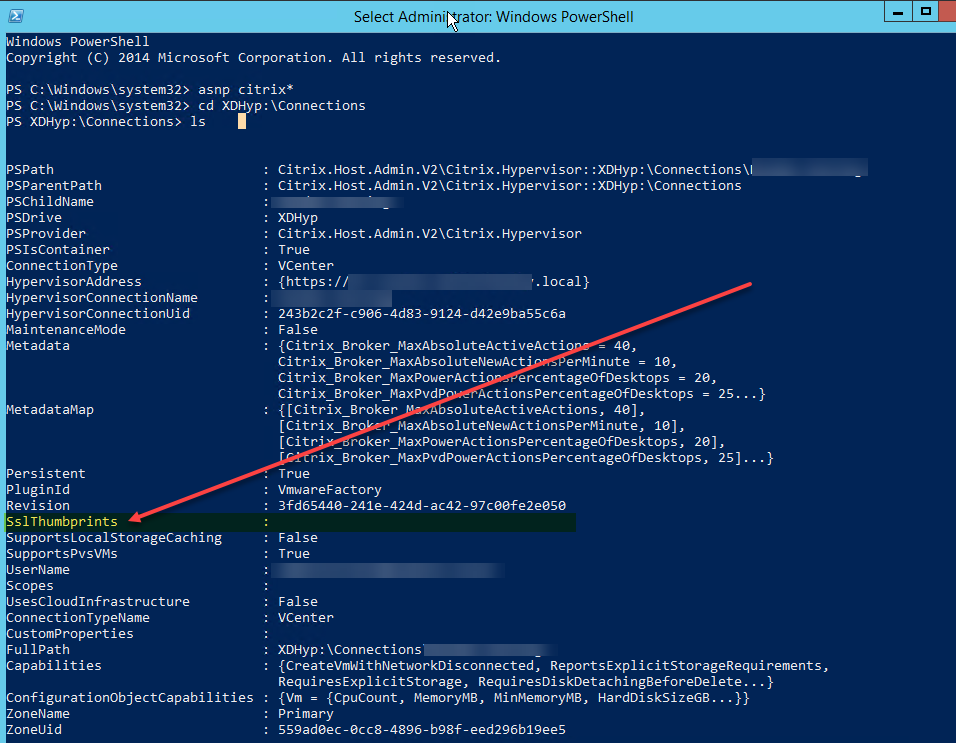
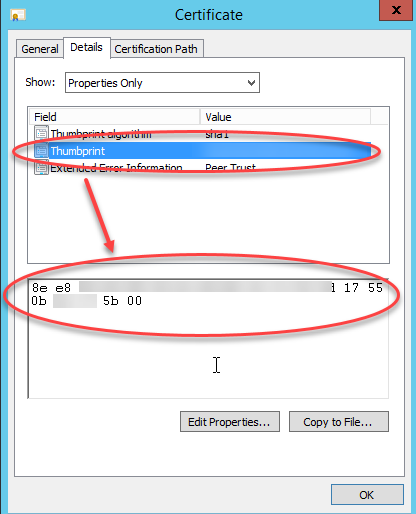
If it’s empty (or the wrong value), as in the above example, open your imported certificate, copy and paste the Thumbprint value into any texteditor, remove all spaces and convert the string into UPPERCASE.

If you’ve got the string available as mentioned above, you need to execute the following command in an administrative POSH console

Set-Item -LiteralPath "XDHyp:\Connections\%hostconnection%" -sslthumbprint "%value%" -hypervisorAddress https://vcenter.domain.local

Once executed, a ls on XDHyp:/Connections should show the correct SSLThumbprint value

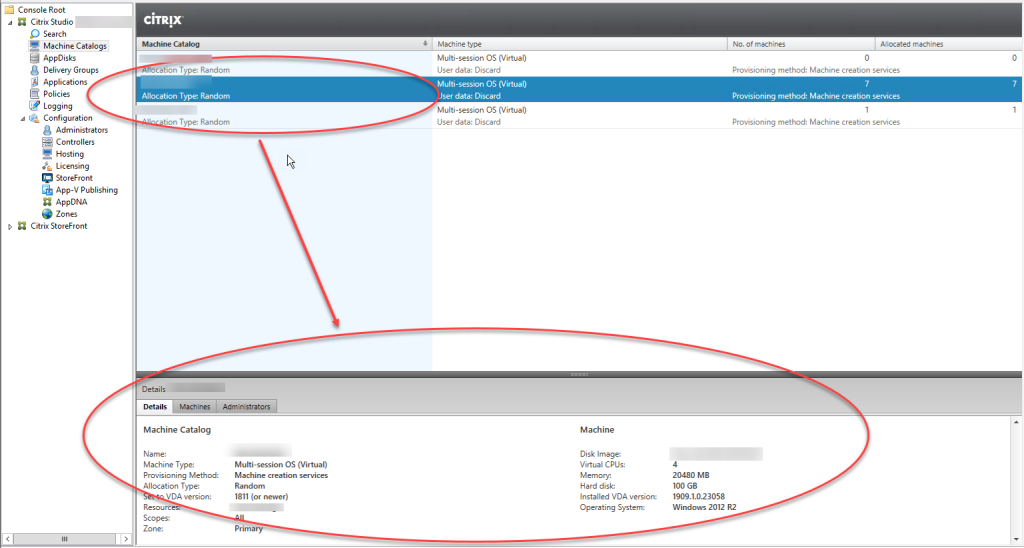
If you open up Citrix Studio your Hosting Connection and Machine Catalog should show without error now

28 comments

  1. Mike Streetz says:

    The first cert in the chain is always the host cert and the last cert is always a CA.
    Windows displays the root cert at the top, but the chain starts from the bottom.
    So although you call out using the Host Cert, that is actually the first cert and not the last, which is counter intuitive given you need to put it in the Root CA folder.

    • Hi Mike, thanks for your reply. I couldn’t find much information on how to read the order of certificates, but I assume your right. Any source info on this is welcome.

      We reach the same conclusion though, that putting the host certificate in the Root CA folder is counter intuitive.

      • Mike Steetz says:

        Some references.

        https://www.digicert.com/kb/ssl-support/pem-ssl-creation.htm
        https://support.dnsimple.com/articles/what-is-ssl-certificate-chain/

        If you think about it in the order in which they appear in the chain file, the host cert is the first one there.

        I only mention it because Citrix Support now uses the contents of your article (uncredited I might add) when you call them with this issue and they tell you to install the last cert, so I installed the root cert and was still running into issues.

        • Hi Mike,

          I’ve gone through your references and granted, the order in both articles is top to bottom. Neither article refers to first and/or last though. The last article is actually ambigious about it: “Certificate 6, the one at the top of the chain (or at the end, depending on how you read the chain), is called root certificate.”

          My article however, clearly states that: “…the certificate we need, is the last certificate in the chain, the ‘host certificate’ with the actual subject name of your vCenter”. So no reference to the Root certificate

          Since Windows shows the certificate chain bottom to top, it might by confusing to certain people refering to first or last. So I will adapt my text with a link to your article. Thanks for your input

          Cheers,
          Misja

  2. hasan says:

    HI

    When I tried to update thumbprint power-shell throws an error prompting invalid credentials. Which credentials should I use? Im using a SQL server sysadmin role user and password

    • Hi Hasan,

      I’m not sure but I’d load a adminstrative POSH on your Desktop Delivery Controller, load the Citrix modules and execute the command without any credentials. See if that works for you.

      Regards,
      Misja

      • Mike Streetz says:

        I had the exact same error, even manually changing the thumbprint in the database wouldn’t fix it.
        I had to upgrade my whole site past 7.15 CU3 so it would prompt me to accept the thumbprint and when I looked in the database it was exactly the same as what I had in there manually.
        I have a case open with Citrix about it but you might have to upgrade to get around it.

  3. Denis Crowley says:

    This is the one and only solution to this issue
    Note:

    Set-Item -LiteralPath “XDHyp:\Connections\%hostconnection%” -sslthumbprint “%value%” -hypervisorAddress https://vcenter.domain.local

    Take the info for the command to run from the ls output
    1. replace %hostconection% with the name of your connection in studio
    2. replace values with the right thumbprint
    3. replace the https://vcenter… with exactly what it says in the ls output (for me it was an ip address
    4. If you copy paste the command replace the quotation marks with your own ones. POSH does not like copy.paste quotation marks.

    Worked a dream for me Misja thanks

    Fianlly: don’t overstress the certs. download the new vCenter cert and install it everyehere. once the thumbprint is updated it will work

    • zul says:

      Hi Denis,

      When follow your steps using the POSH, is it need to install new vCenter cert in the both delivery controller? Or we just run your POSH command in the both DDC and no need install the vCenter cert? Can advise on this?

  4. Igor says:

    Hi,

    I installed the new certificate and I continue with out connection with the VCenter. I see that the thumbprint is different to my new certificate. If I use the command to change the thumbprint, I get an error message: “Cannot connect to the VCenter server due to a certificate error”…

    Any help?

    Regards.

    • Hi Igor, it seems to me you’ve missed to install the right certificate somewhere. Please follow all steps outlined above to the letter.

      Regards,
      Misja

      • Igor says:

        Hi,

        Thanks for you answer.
        The certificate I installed is the one I can download from the vcenter webpage, from the secure locker.

        Regards.

        • Igor says:

          Hi,

          I used the same command but with my credentials (citrix admin) as parameters, and now it works. Thanks for your help.

          Regards.

        • zul says:

          Hi Igor,

          Can advise me how to download from vCenter webpage? Do you by from browser, put your vcenter hostname and the just click the lock icon in the URL?

  5. J says:

    Thank you so much for this Misja. After several Citrix KB articles your post was exactly what was required!

  6. bob says:

    Should you use the UserName account that is found when you run ls? The service account for the db or used to install?

    • Hi Bob,

      I’d recommend to logon to your Citrix Desktop Delivery controller with an admin account that has full admin privileges in Citrix Studio. That way you can omit the username parameter in the ‘Set-Item’ command

      Regards,
      Misja

      • bob says:

        yea, I am still getting the certificate error when I run it. The domain root certs should already be installed, but just to be sure I did it again in the two stores listed above.

  7. Sunil Botu says:

    Thanks for this blog, it was helpful to an issue I encountered today.

  8. Hi, that fixed our error. Does anyone know, why you have to update the thumbprint manually? Is there no other function in citrix that does this automatically?
    Have a Nice day

    • Hi Lukas, thanks for you reply. When you create your hosting connection at first deployment, this certificate information is put into the database. If something changes in your hosting connection (migrating your VCSA for instance), you might end up with the issue as per above. You can follow my procedure or create a new hosting connection and machine catalog

  9. Piyush N says:

    Hi Misja
    I can’t thank you enough. Your blogpost save me 2 times for similar issue. Thank you so much.
    Piyush

  10. Juan Carlos Quisbert says:

    Buenas amigos yo tengo el mismo error de conexion con el Vcenter no puedo actualizar la huella digital, cuando ejecuto el comando
    Set-Item -LiteralPath “XDHyp:\Connections\xxxx” -SslThumbprint “xxxxx” -hypervisorAddress https://xxxxxx

    sale el mensaje
    Set-Item : The supplied credentials for the connection are not valid.

    y cuando coloco mis credenciales del administrador de studio sale el mensaje
    “Set-Item : No se puede enlazar el parámetro ‘SecurePassword’. No se puede convertir el valor “xxx” de tipo “System.String” al tipo “System.Security.SecureString”.”

    Alguna idea donde esta el error

    • Hi Juan,

      I had to run your comment through Google Translate as I don’t speak Spanish. But from what I got back, it seems your either use an account which is not full admin in Citrix Studio or you input an incorrect password.

      I’d recommend to logon to your Citrix Desktop Delivery controller with an admin account that has full admin privileges in Citrix Studio. That way you can omit the username parameter in the ‘Set-Item’ command.

      Please run your Powershell instance in Administrative mode as well (although I believe, that’s not necessary, but just in case).

  11. Zul says:

    Hi Misja Geuskens,

    I just want to clarify with you for the “host certificate” or vCenter certificate that should we import to delivery controller.

    Based you explaination, to get that vCenter certificate or “host certificate is by follow the step in the image number 3 in your post? which is put the vCenter hostname > clcik the lock icon that in browser > select general and click install certificate? is it true? I’m bit confused on that statement. Please advice

    • Hi Zul,

      that’s exactly what you need to do.

      Regards,
      Misja

      • zul says:

        Hi Misja,

        Thank you for the verification on this as previously i just download the trusted root CA certificate. Now i know where to get the vCenter certificate

        Just want to asking 1 more things. For the trusted root CA certificate, is it required in this procedure?

Leave a Reply to Lukas Meßmer Cancel reply

Your email address will not be published. Required fields are marked *

This site uses Akismet to reduce spam. Learn how your comment data is processed.